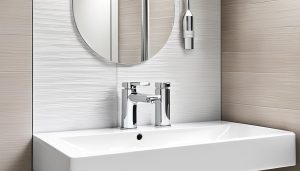
If you have bathroom cladding installed and want to give it a fresh look, you may be wondering if you can paint it. Painting bathroom cladding is indeed possible and can be a great way to transform the appearance of your bathroom. By following the right steps and using the appropriate paint, you can achieve a stunning result. Here are some tips to help you paint bathroom cladding and achieve a fresh new look.
Key Takeaways:
- Painting bathroom cladding can refresh the look of your bathroom.
- Proper surface preparation is crucial for a successful paint job.
- Choose a paint that is durable and waterproof, such as a two-part epoxy or acrylic enamel.
- Use the right application techniques for a professional finish.
- Maintain painted bathroom cladding to ensure its longevity.
How to Prepare Bathroom Cladding for Painting
Before you start painting bathroom cladding, it’s important to properly prepare the surface. Follow these steps to ensure a smooth and successful painting process:
-
Start by cleaning the cladding thoroughly. Use a mild detergent and warm water to remove any dirt, grime, or grease. Scrub gently with a sponge or soft brush, then rinse with clean water and allow it to dry completely.
-
Inspect the cladding for any damages or imperfections. Fill any cracks or holes with an appropriate filler and smooth it out with a putty knife. Sand the filled areas lightly to create an even surface.
-
If the surface of the cladding is glossy or has a sheen, it’s essential to lightly sand it to create a rougher texture. This will help the paint adhere better. Use fine-grit sandpaper and sand in a circular motion.
-
Next, wipe down the cladding with a clean, damp cloth to remove any dust created during the sanding process. Make sure the surface is completely dry before proceeding.
-
If there are any areas where the cladding meets other materials, such as corners or edges, use painter’s tape to protect those surfaces from paint. This will ensure clean and precise lines.
-
Finally, apply a coat of primer specifically designed for bathroom surfaces. This will create a smooth base for the paint and improve its durability. Follow the manufacturer’s instructions for application and drying times.
Preparing bathroom cladding for painting is an important step to ensure a successful transformation.
Choosing the Right Paint for Bathroom Cladding
When it comes to giving your bathroom cladding a fresh new look, choosing the right paint is essential. The paint you select should not only enhance the aesthetic appeal of the cladding but also provide durability and waterproofing in the high-moisture environment of the bathroom.
For the best results, it is recommended to use a two-part epoxy paint or acrylic enamel specifically designed for bathroom cladding. These types of paint offer excellent adhesion, moisture resistance, and long-lasting protection against wear and tear.
Two-Part Epoxy Paint
Two-part epoxy paint is a popular choice for painting bathroom cladding due to its exceptional durability and waterproof properties. This type of paint consists of a resin and a hardener, which, when mixed together, create a strong chemical bond that forms a protective barrier on the surface of the cladding.
With its high resistance to moisture, stains, and chemicals, two-part epoxy paint can withstand the harsh conditions of the bathroom, ensuring that your painted cladding stays vibrant and beautiful for years to come.
Acrylic Enamel Paint
Acrylic enamel paint is another excellent option for painting bathroom cladding. It offers a durable finish that is resistant to water, mildew, and fading. Acrylic enamel paint is easy to apply and dries quickly, allowing for faster project completion.
Additionally, acrylic enamel paint is available in a wide range of colors, allowing you to choose the perfect shade to complement your bathroom’s decor. Whether you prefer a bold statement or a subtle and soothing palette, acrylic enamel paint can help you achieve the desired look.
| Paint Type | Benefits |
|---|---|
| Two-Part Epoxy Paint | Durable, waterproof, resistant to moisture, stains, and chemicals |
| Acrylic Enamel Paint | Durable, water-resistant, quick-drying, wide range of colors |
When selecting a paint color, consider the overall style and ambiance you want to achieve in your bathroom. Whether you opt for a classic white, a calming blue, or a trendy gray, the right paint can completely transform your bathroom cladding and give it a fresh new look.
Now that you know the best paint options for your bathroom cladding, the next section will guide you through the application techniques to ensure a professional finish.
Application Techniques for Painting Bathroom Cladding
When it comes to painting bathroom cladding, using the right application techniques can make a significant difference in achieving a professional and flawless finish. Here are some tips to keep in mind:
1. Prepare the surface:
Before you start painting, ensure that the bathroom cladding surface is clean and free from any dust or grime. Use a mild detergent or a specially formulated cleaner to remove any residue. Rinse thoroughly and allow it to dry completely.
2. Use an appropriate primer:
Priming the bathroom cladding before painting can help create a smooth and durable surface. Choose a primer that is compatible with the type of cladding material you have. Apply the primer evenly using a brush or roller, following the manufacturer’s instructions.
3. Select the right paint:
Opt for a high-quality paint that is specifically designed for bathroom and moisture-prone areas. Look for paints that offer durability, moisture resistance, and a smooth finish. Matte, satin, or semi-gloss finishes are popular choices for bathroom cladding.
Pro Tip: Consider using a paint with antibacterial properties to maintain a hygienic environment in your bathroom.
4. Apply the paint:
When applying the paint, use a brush or a short-nap roller for an even and consistent coverage. Start from the top and work your way down, applying the paint in smooth, overlapping strokes. Take your time and ensure that there are no drips or runs.
5. Allow proper drying time:
Follow the manufacturer’s instructions for drying time between coats. It is important to allow each coat to dry completely before applying the next one. This will help prevent smudging or uneven application.
6. Apply multiple coats (if needed):
If you desire a more opaque or vibrant color, you may need to apply multiple coats of paint. Allow each coat to dry before applying the next. Be patient and ensure that each coat is evenly applied for a seamless finish.
By following these application techniques, you can achieve a beautifully painted bathroom cladding that enhances the overall look and feel of your bathroom.
Quick Tips Recap:
- Prepare the surface by cleaning and priming the cladding.
- Choose a high-quality paint designed for bathrooms.
- Apply the paint evenly using a brush or roller.
- Allow proper drying time between coats.
- Apply multiple coats for a more opaque or vibrant color.
Maintenance Tips for Painted Bathroom Cladding
Once you have painted your bathroom cladding, it’s important to take proper care of it to ensure its longevity. By following these maintenance tips, you can keep your painted bathroom cladding looking fresh and beautiful for years to come.
- Regular Cleaning: Clean your painted bathroom cladding regularly to remove dirt, grime, and any accumulated residue. Use a mild soap or detergent and a soft cloth or sponge to gently clean the surface. Avoid using abrasive or harsh cleaning agents that may damage the paint.
- Avoid Scratches: Be cautious when using sharp or abrasive objects near the painted surface. Scratches can not only mar the appearance of the cladding but also compromise its waterproofing. Use gentle cleaning tools and avoid dragging heavy objects across the cladding.
- Prevent Moisture Build-up: Proper ventilation is key to preventing moisture build-up on your bathroom cladding. Ensure that your bathroom is adequately ventilated to prevent excess moisture from damaging the painted surface.
- Inspect for Damage: Regularly inspect your painted bathroom cladding for any signs of damage. Look out for chips, cracks, or peeling paint. If you notice any issues, address them promptly to prevent further damage.
- Touch-up as Needed: Over time, the painted surface of your bathroom cladding may experience wear and tear. If you notice any areas where the paint has worn off or faded, consider touching up those spots to maintain a consistent appearance.
By following these maintenance tips, you can prolong the life and beauty of your painted bathroom cladding. With proper care, your bathroom will continue to showcase a fresh and vibrant look.
Can You Paint Shower Wall Panels?
If you have shower wall panels in your bathroom and want to give them a new look, you may be wondering if you can paint them. The answer is yes, you can paint shower wall panels. By following the proper preparation and painting techniques, you can achieve a fresh and updated appearance for your shower area.
When it comes to painting shower wall panels, it’s important to ensure that the surface is clean and free from any dirt or grime. Start by thoroughly cleaning the panels using a mild soap and water solution. Scrub the panels gently with a soft brush or sponge, and rinse them well to remove any residue.
Once the shower wall panels are clean, use a fine-grit sandpaper to lightly sand the surface. This will create a rough texture that allows the paint to adhere better. After sanding, wipe away any dust with a clean, damp cloth.
Next, apply a high-quality primer to the shower wall panels. The primer will help the paint adhere to the surface and provide a smooth and even finish. Make sure to choose a primer that is suitable for use on bathroom surfaces and follow the manufacturer’s instructions for application and drying times.
After the primer has dried, you can start painting the shower wall panels. Use a paintbrush or roller to apply an acrylic enamel paint or a two-part epoxy paint. These types of paint are designed to withstand moisture and provide long-lasting results. Apply the paint evenly in smooth strokes, working in small sections at a time.
Allow the first coat of paint to dry completely before applying a second coat if necessary. This will ensure a more vibrant and durable finish. Once the second coat is dry, inspect the painted shower wall panels for any touch-ups or areas that may need additional coverage.
Tip: To protect the freshly painted shower wall panels, consider applying a clear waterproof sealant. This will add an extra layer of protection and help extend the lifespan of the paint.
With the proper preparation and painting techniques, you can transform the look of your shower area by painting the shower wall panels. Whether you want to update the color or refresh the appearance, painting shower wall panels is a great way to give your bathroom a new and personalized touch.
How to Prepare Shower Wall Panels for Painting
Before painting your shower wall panels, it’s crucial to properly prepare the surface for optimal results. By following these steps, you can ensure a smooth painting process and achieve a beautifully painted finish.
Step 1: Clean the Panels
- Start by cleaning the shower wall panels thoroughly. Use a mild detergent or a bathroom cleaner to remove any dirt, grime, or soap residue. Rinse the panels with clean water and allow them to dry completely.
- Inspect the panels for any mold or mildew growth. If you notice any, use a bleach solution or a mildew-resistant cleaner to eliminate the growth. Rinse the panels again and make sure they are completely dry before moving on to the next step.
Step 2: Sand the Surface
- Once the panels are clean and dry, lightly sand the entire surface. This will help create a rough texture that allows the paint to adhere better. Use a fine-grit sandpaper and make sure to sand in a circular motion.
- After sanding, wipe away the dust with a clean, damp cloth or sponge. Make sure there is no residue left on the panels.
Step 3: Repair Any Damage
- If you notice any cracks, chips, or other damage on the shower wall panels, it’s important to repair them before painting. Use a suitable filler or caulk to fill in the damaged areas and smooth them out with a putty knife or a scraper.
- Allow the filler or caulk to dry completely according to the manufacturer’s instructions. Once dry, sand the repaired areas lightly to ensure a seamless finish.
Step 4: Protect Surrounding Areas
- Before you start painting, protect the surrounding areas such as the shower fixtures, tiles, and floor. Use painter’s tape to cover any areas that you don’t want to be painted. This will help you achieve a clean, professional-looking result.
Step 5: Prime the Panels
- Applying a primer to the shower wall panels is essential to ensure proper adhesion and durability of the paint. Choose a primer specifically designed for bathroom applications.
- Apply the primer evenly to the panels using a brush or a roller. Follow the manufacturer’s instructions for the recommended drying time.
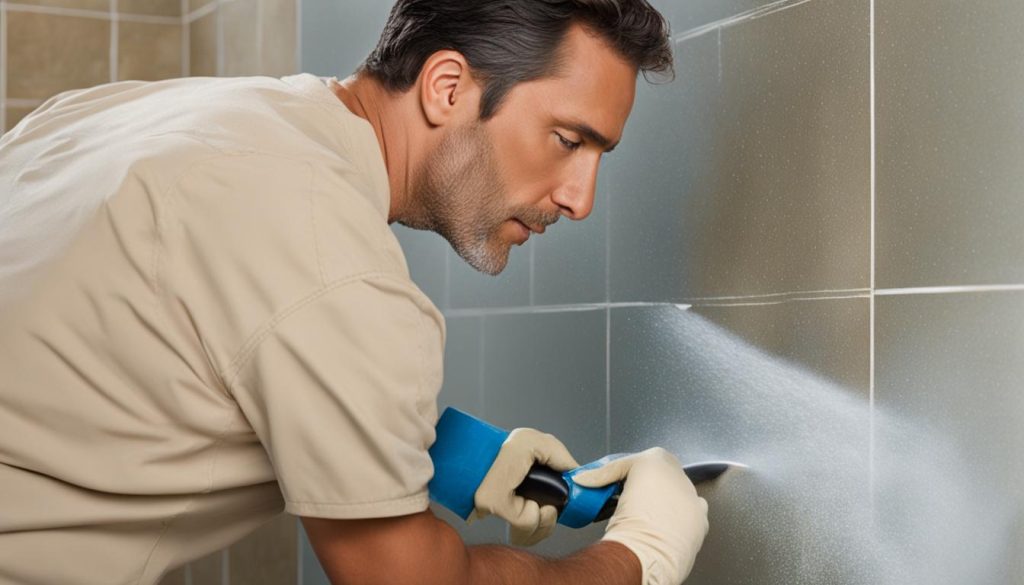
Following these preparation steps will help you achieve a successful shower wall panel painting project. Once the panels are properly prepared, you can proceed with painting them using the techniques and tips mentioned in the following sections.
Choosing the Right Paint for Shower Wall Panels
When it comes to painting shower wall panels, selecting the right paint is crucial to ensure long-lasting results in the high moisture environment. Look for paints specifically designed for wet areas like showers, as they provide better durability and waterproofing.
Two popular options for painting shower wall panels are:
- Two-Part Epoxy Paint: This type of paint consists of a resin and a hardener that need to be mixed together before application. Two-part epoxy paint forms a strong and durable finish that can withstand the constant exposure to water and humidity in the shower. It provides excellent adhesion and is resistant to cracking, peeling, and fading.
- Acrylic Enamel Paint: Acrylic enamel paint is another suitable choice for shower wall panels. It offers good moisture resistance and durability. Acrylic enamel is easy to clean and maintain, making it a practical option for bathrooms.
Both two-part epoxy paint and acrylic enamel paint are available in a wide range of colors, allowing you to choose the perfect shade for your shower wall panels.
Before purchasing the paint, ensure that it is labeled as suitable for wet areas and bathroom use. This ensures that the paint has the necessary properties to withstand the constant exposure to water and moisture.
Key Points:
- Choose a paint specifically designed for wet areas like showers.
- Consider two-part epoxy paint or acrylic enamel paint for their durability and moisture resistance.
- Ensure the paint is labeled as suitable for wet areas and bathroom use.
Tips for Painting Shower Wall Panels
When it comes to painting shower wall panels, there are a few key tips to keep in mind to ensure a successful and professional-looking result. Follow these tips to achieve a refreshed and beautiful shower area:
1. Start with Proper Preparation
Before you begin painting, it’s crucial to properly prepare the surface of your shower wall panels. Clean the panels thoroughly, removing any dirt, soap residue, or mildew. This will help the paint adhere better and ensure a smoother finish. You can use a mild detergent or a specially formulated cleaner for shower areas. Rinse the panels well and allow them to dry completely before proceeding.
2. Use High-Quality Paint
Choosing the right paint is essential for long-lasting and durable results. Look for a paint that is specifically formulated for use in high-moisture environments, such as a bathroom or shower. A two-part epoxy paint or an acrylic enamel paint is recommended, as they provide better resistance to water and moisture. These types of paint are designed to withstand the humid conditions of a shower area and will result in a more durable finish.
3. Apply Primer
Applying a primer before painting shower wall panels can help improve the adhesion of the paint and ensure better coverage. Choose a primer that is compatible with the type of paint you are using and follow the manufacturer’s instructions for application. Allow the primer to dry completely before proceeding with the paint.
4. Use Proper Brushing or Rolling Techniques
When applying paint to shower wall panels, it’s important to use the proper techniques to achieve a smooth and even finish. If using a brush, apply the paint in long, smooth strokes, following the natural contours of the panels. If using a roller, choose one with a smooth or semi-smooth surface and use even pressure for consistent coverage. Avoid excessive brushing or rolling, as it can result in visible brush strokes or roller marks.
5. Allow Sufficient Drying Time
After applying the paint to the shower wall panels, allow sufficient drying time before using the shower. Follow the manufacturer’s instructions for the recommended drying time, as it can vary depending on the specific paint product. Rushing the drying process can lead to smudges, streaks, or other imperfections. Patience is key to achieving a flawless and durable finish.
| Tips for Painting Shower Wall Panels | |
|---|---|
| Start with Proper Preparation | Clean the panels thoroughly, removing any dirt, soap residue, or mildew. |
| Use High-Quality Paint | Choose a paint specifically formulated for high-moisture environments. |
| Apply Primer | Use a suitable primer to improve adhesion and coverage. |
| Use Proper Brushing or Rolling Techniques | Apply paint with smooth, even strokes or pressure. |
| Allow Sufficient Drying Time | Follow the recommended drying time to avoid imperfections. |
By following these tips, you can successfully paint your shower wall panels and achieve a fresh and updated look for your shower area. Remember to prioritize proper preparation, use high-quality paint, apply primer, use the right techniques, and allow sufficient drying time for best results. Transform your shower space into a beautiful oasis with a simple and affordable DIY painting project.
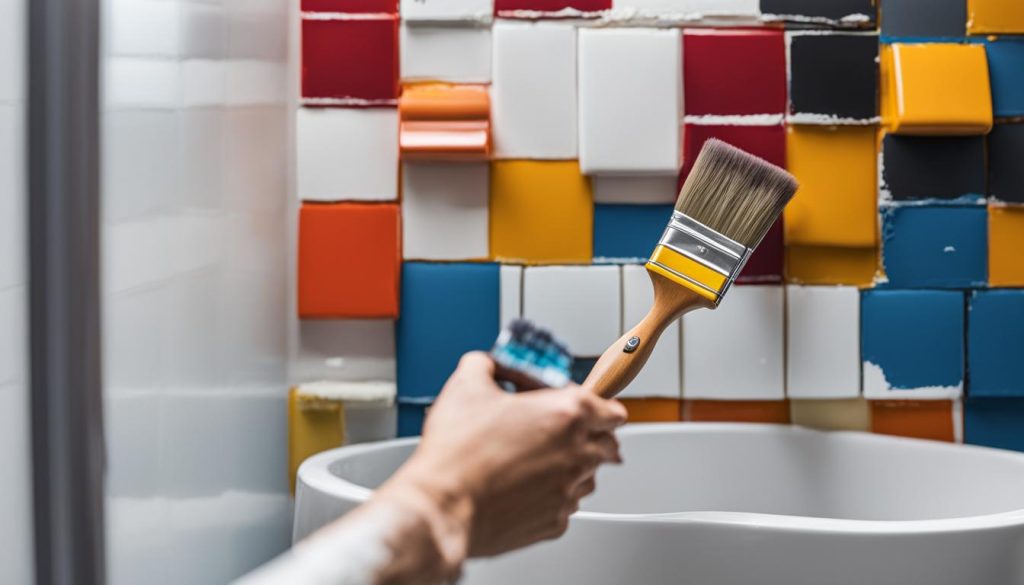
Maintenance Tips for Painted Shower Wall Panels
Now that you’ve painted your shower wall panels, it’s important to know how to properly maintain them to keep them looking their best and ensure their longevity. With the right care, you can enjoy your newly painted shower for years to come. Here are some maintenance tips to keep in mind:
1. Regular Cleaning: To keep your painted shower wall panels clean, wipe them down regularly with a mild soap and water solution. Avoid using abrasive cleaners or brushes that could damage the painted surface. A soft cloth or sponge is usually sufficient for cleaning.
2. Avoid Harsh Chemicals: When cleaning your painted shower wall panels, avoid using harsh chemicals like bleach or ammonia. These can damage the paint and cause it to peel or fade over time. Stick to gentle cleaning agents to protect the finish.
3. Prevent Moisture Build-Up: Excessive moisture can cause damage to painted shower wall panels. To prevent moisture build-up, ensure proper ventilation in your bathroom by using an exhaust fan or opening a window during and after showering. This will help to reduce humidity levels and protect the painted surface.
4. Promptly Address Issues: If you notice any peeling or cracking of the paint on your shower wall panels, address it promptly. Touching up the affected areas with matching paint can help maintain the integrity of the finish, preventing further damage.
By following these maintenance tips, you can extend the life of your painted shower wall panels and continue to enjoy a beautiful and refreshed bathroom space.

