Installing bathroom wall panels can give your space a stylish, waterproof finish. With the right preparation and materials, it is a manageable DIY project for most homeowners. In this comprehensive guide, we will walk you through the key steps for measuring, cutting, installing, and sealing bathroom wall panels. Follow along as we break down the process into detailed yet easy-to-follow instructions. Remember to bookmark this page to save the instructions for later!
Key Takeaways
- Installing bathroom wall cladding is a feasible DIY project for most homeowners.
- Proper preparation, including measuring, cutting, and sealing, is crucial for a successful installation.
- Ensure you have the necessary tools and materials, such as wall panels, sealant, screws, and a spirit level.
- Take your time and follow the step-by-step instructions to achieve professional-looking results.
- Bookmark this guide for future reference and enjoy the transformed look and functionality of your bathroom walls.
Tools and Materials for Bathroom Cladding Installation
To install bathroom wall cladding, you will need the following tools and materials:
Tools:
- Saw for trimming panels
- Spirit level
- Tape measure
- Sharp knife
- Sandpaper
Materials:
- Wall Panels (typically PVC or acrylic)
- Sealant/adhesive for panels
- Silicone sealant for waterproofing
- Screws and plugs for securing panels
- Spacers for expansion gaps
Having the right tools and materials is essential to ensure a smooth and successful bathroom cladding installation. The saw will help you trim the panels to the correct size, while the spirit level and tape measure will ensure accurate measurements and straight panel placement. A sharp knife will be necessary for detailed cuts around obstacles, and sandpaper will come in handy for smoothing rough edges. When it comes to materials, PVC or acrylic wall panels are commonly used due to their durability and water resistance. You’ll also need sealant or adhesive to secure the panels and silicone sealant to waterproof joints. Additionally, make sure to have screws, plugs, and spacers on hand to properly secure the panels and provide expansion gaps for thermal movement. With these tools and materials, you’ll be well-equipped to tackle your bathroom cladding project with confidence.
Preparing the Walls for Bathroom Cladding
Before installing bathroom wall cladding, it’s important to properly prepare the walls. Follow these key steps to ensure a successful installation:
- Make sure the walls are dry, clean, and free from mold before starting. You can use a damp cloth or sponge to remove any dirt or debris.
- Fill any cracks or holes in the walls with filler and smooth the surface with sandpaper. This will create a clean and even base for the cladding panels.
- Clean the walls thoroughly with a mild detergent solution. Scrub the walls gently to remove any traces of grease, soap scum, or other residues. Rinse the walls with clean water and let them dry completely.
- Temporarily remove any wall-mounted fixtures or accessories such as towel rails, soap dishes, or mirrors. This will allow you to install the cladding panels seamlessly without any obstructions.
By properly preparing the walls, you’ll ensure that the bathroom cladding adheres securely and provides a smooth, attractive finish. Now that the walls are ready, you can move on to the next step of measuring and planning for the installation.
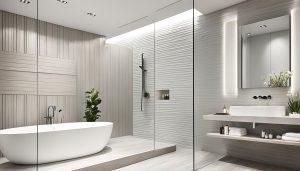
Example Image of Preparing Walls for Bathroom Cladding:

| Step | Actions |
|---|---|
| 1 | Make sure the walls are dry, clean, and free from mold. |
| 2 | Fill any cracks or holes in the walls with filler and sand smooth. |
| 3 | Clean the walls thoroughly with detergent, rinse, and let dry completely. |
| 4 | Remove any wall-mounted fixtures temporarily, such as towel rails, soap dishes, mirrors. |
Measuring and Planning for Bathroom Cladding
Accurate measurements and planning are crucial for a successful bathroom cladding installation. By following these steps, you can ensure a seamless and precise outcome:
- Carefully measure the entire wall space: Take accurate measurements of your bathroom walls, including windows, doors, corners, and any obstacles like pipes. This will help you determine the number of panels needed and plan their placement.
- Create a panel layout: Using your measurements, create a paper layout or a digital plan to visualize the placement of the panels. Mark where you will need to cut panels to fit specific areas.
- Purchase extra panels: It’s always a good idea to buy a few extra panels to account for any mistakes during the installation process. Additionally, allow for 5-10mm expansion gaps between each panel and at the perimeter edges to accommodate for movement and ensure a proper fit.
By taking accurate measurements, creating a panel layout, and buying extra panels, you’ll be well-prepared for a smooth bathroom cladding installation.

Example Panel Layout
| Wall Area | Panel Quantity |
|---|---|
| Main Wall | 4 |
| Wall with Window | 2 |
| Corner Wall | 1 |
| Total | 7 |
In this example, you would need a total of 7 panels to cover the various wall areas in your bathroom. Remember to adjust the panel quantity according to your specific measurements and layout.
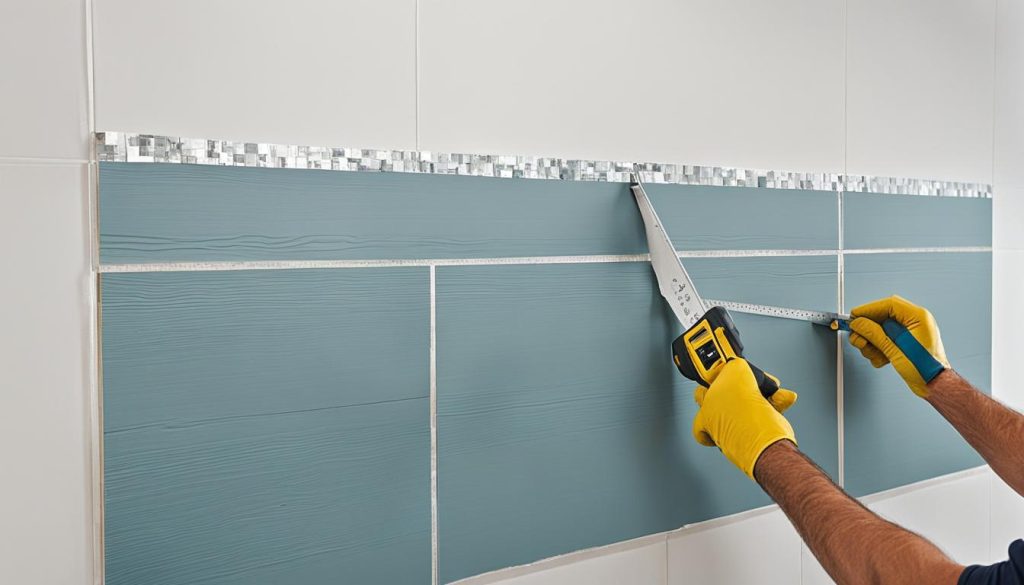
Cutting and Trimming Panels for Bathroom Cladding
When it comes to bathroom cladding installation, cutting and trimming panels is a crucial step that requires attention to detail. Follow these guidelines to achieve precise and professional results:
- Lay your panels on the floor and use the provided layout to measure and mark the cutting lines. This will ensure accuracy and a seamless installation.
- For straight cuts along the edges, use a fine-toothed saw. It’s essential to maintain a smooth and clean cut, so take your time and use steady strokes.
- When it comes to detailed cuts around obstacles such as corners or pipes, a sharp knife is your best friend. Make sure to score the panel lightly, using multiple shallow cuts if necessary, and then snap it along the score line.
- Always cut with the decorative panel side facing up to avoid scratching the finish. By cutting just inside the marked line, you’ll ensure a precise fit.
- Once you’ve made your cuts, dry fit all the panels to check if any adjustments need to be made for a perfect fit. Numbering the panels will help you keep track of the order and avoid confusion during installation.
Remember, accuracy is key when cutting and trimming panels for bathroom cladding. Taking the time to measure and cut carefully will result in a visually pleasing and flawless finish.
Top Tools for Panel Cutting
| Tool | Usage |
|---|---|
| Fine-toothed Saw | Ideal for straight cuts along the edges of the panels. |
| Sharp Knife | Perfect for detailed cuts around corners and obstacles. |
| Measuring Tape | Essential for accurate measurements and marking cutting lines. |
| Set Square | Helps ensure precise angles when making corner cuts. |
By using the right cutting tools and following these guidelines, you’ll be able to easily trim and adjust your bathroom cladding panels to fit any corner or obstacle in your space.
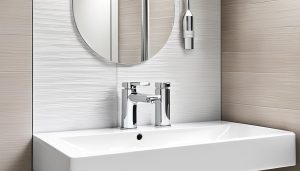
Installing Bathroom Wall Panels
Now it’s time to install the bathroom wall panels. Follow these steps:
- Ensure walls are clean, dry, and dust-free. Vacuum if needed.
- Find the lowest point of the wall with a spirit level and mark a straight reference line.
- Apply adhesive to the back of the first panel using a trowel. Lift and place it onto the wall, aligning the bottom edge to your reference line.
- Drill screws into top and bottom plugs to securely fix the panel. Place spacers at side edges.
- Slot subsequent panels into place, wiping away any excess adhesive as you go.
- Around obstacles, fit numbered cut panels and seal gaps with silicone sealant.
With these simple instructions, you can successfully install your bathroom wall panels and achieve a beautiful and waterproof finish. Remember to use the appropriate adhesive, secure the panels with screws, and use spacers to create expansion gaps. Fitting panels around obstacles may require some cutting and trimming, but with careful measurement and silicone sealant, you can ensure a seamless look.
Finishing the Bathroom Cladding Installation
After successfully installing the bathroom wall panels, it’s time to add those final touches that will complete the project and give your bathroom a polished look.
Sealing Joints with Silicone Sealant
To ensure a watertight and secure installation, it’s essential to seal all joints and perimeter edges of the wall panels with silicone sealant. This not only prevents water leakage but also helps maintain the integrity of the cladding.
Here’s how to seal the joints effectively:
- Clean the joints and perimeter edges thoroughly to remove any dust or debris.
- Apply a bead of silicone sealant along the joints and edges.
- Smooth the sealant with a wet finger or a sealant smoothing tool to create a neat finish.
Curing Adhesive and Silicone
Allow the adhesive and silicone sealant to cure fully before using the shower or exposing the panels to excessive moisture. This curing process typically takes around 24-48 hours, but refer to the manufacturer’s instructions for specific recommendations.
Reinstallation of Fixtures
Now that your wall panels are securely in place, it’s time to reinstall any wall fittings or fixtures that were temporarily removed during the installation process. This includes towel rails, soap dishes, mirrors, and other accessories.
Make sure to seal any gaps behind the fixtures with silicone sealant to maintain a watertight barrier and prevent water damage.
Cleaning Cladded Panels
Once the installation is complete, it’s important to keep your newly cladded panels clean and free from dirt and grime. Regular cleaning will not only keep your bathroom looking fresh but also help prolong the lifespan of the wall cladding.
Here’s how to properly clean your cladded panels:
- Use a soft cloth or sponge dampened with mild detergent to gently wipe down the panels.
- Rinse the panels thoroughly with clean water to remove any soap residue.
- Dry the panels with a soft towel or cloth to prevent water spots or streaks.
Regular cleaning will ensure your bathroom cladding continues to look sparkling and new for years to come.
Installing Bathroom Wall Panels Over Tiles
While it is possible to install bathroom wall panels over existing tiles, there are some considerations to keep in mind:
- Adhesion: Adhesion may be compromised, as the panels may not adhere properly long-term, especially in a damp bathroom environment.
- Proper Preparation: Proper preparation is key, including thorough cleaning, degreasing, and roughening the tile surface.
- Moisture Issues: Moisture issues can still arise, as water can penetrate grout and get trapped between the tile and panels, leading to mold growth.
- Visible Imperfections: Imperfections in the tile, such as grout lines and uneven surfaces, may be visible through the panels.
- Tile Damage and Warranty: Tile damage and limited warranty coverage may be a concern when installing panels over existing tiles.
“Installing bathroom wall panels over tiles can present challenges in terms of adhesion and potential moisture issues. Proper preparation and realistic expectations are crucial.”
If you choose to install wall panels over tiles, it is important to follow specific guidelines and consult a professional if you are unsure.
Conclusion
Installing bathroom wall cladding yourself can be a satisfying and cost-effective DIY project that transforms your bathroom into a stylish and functional space. By following the proper steps and using the right tools and materials, you can achieve professional-looking results without the need for expensive contractors.
It is important to allow adhesives and silicone sealants to fully cure before using your newly clad bathroom. This ensures a strong and long-lasting bond that will withstand everyday use and maintain the integrity of your walls. Take the time to enjoy the transformation and the hassle-free maintenance of your beautiful new bathroom walls.
Remember, thorough preparation, accurate measurements, and careful planning are key to a successful installation. With the right guidance and attention to detail, you can confidently tackle the installation of bathroom wall cladding and create a space that you’ll be proud of for years to come.