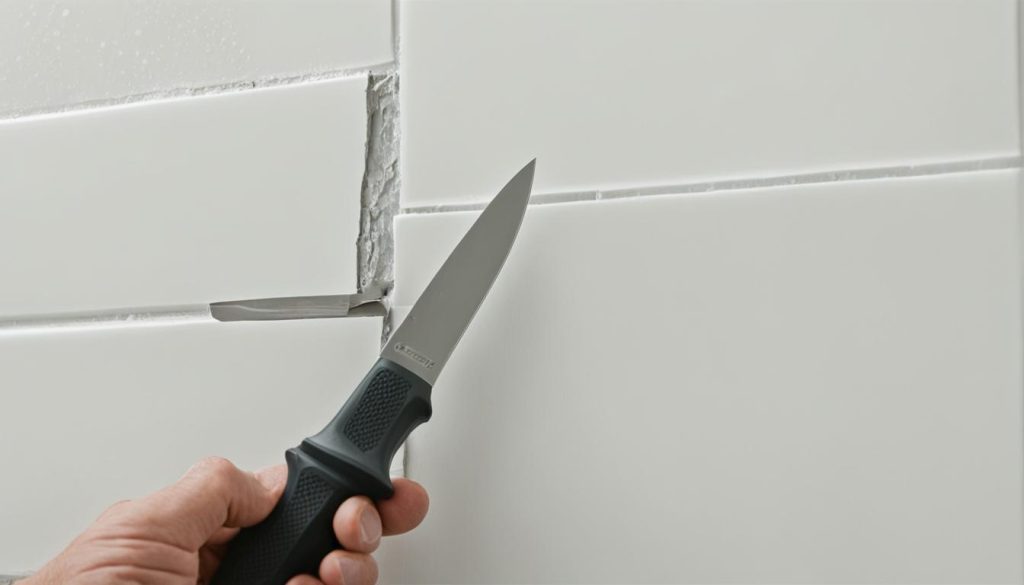
Are you considering installing bathroom wall cladding but unsure about the cutting process? Look no further! In this article, we will provide you with all the information you need about cutting bathroom wall cladding with a Stanley knife. Whether you’re a seasoned DIY enthusiast or a beginner, we’ve got you covered with our expert tips and techniques. So, let’s dive in and discover how you can achieve a professional finish for your bathroom walls.
Key Takeaways:
- Bathroom wall panels are a stylish and cost-effective alternative to tiles in your bathroom.
- There are different types of bathroom wall panels, including laminate, compact tile, PVC, and acrylic, each with unique properties and styles.
- Bathroom wall panels are 100% waterproof, easy to install, and require minimal maintenance.
- You can fit bathroom wall panels over existing tiles with proper preparation and adhesive.
- Installing bathroom wall panels involves measuring, cutting, applying adhesive, and fixing the panels to the wall.
What are Bathroom Wall Panels?
Bathroom wall panels, also known as shower panels or wet walls, are a 100% waterproof solution for your bathroom walls. They are a stylish alternative to tiles and offer a variety of benefits. Bathroom wall panels are long-lasting, easy to install, and come in a variety of styles, making them a versatile choice for any bathroom.
With bathroom wall panels, you can transform your bathroom into a luxurious retreat. Whether you prefer classic marble finishes, rustic wooden looks, textured concrete effects, or glossy styles with metallic and sparkly accents, there is a panel design to suit your taste.
Each panel is sold in standard sizes but can be easily cut or trimmed to fit your space, allowing for flexibility in installation. Whether you choose to decorate the entire bathroom, install them behind the bath, or use them inside shower enclosures, bathroom wall panels provide a seamless and stylish finish.
Not only are bathroom wall panels attractive, but they are also practical. They are 100% waterproof, preventing water damage and dampness on your walls. This makes them an ideal choice for wet areas such as showers. Additionally, bathroom wall panels are easy to clean and require minimal maintenance, saving you time and effort in the long run.
The installation process for bathroom wall panels is hassle-free. You can easily install them yourself, eliminating the need for expensive professional installation. This makes them a cost-effective solution for updating your bathroom. Plus, with a wide range of styles to choose from, bathroom wall panels offer a stylish alternative to traditional tiles without compromising on durability or functionality.
So if you’re looking for a waterproof, easy-to-install, and stylish alternative to tiles, bathroom wall panels are the perfect choice. With their variety of styles and long-lasting qualities, they are sure to transform your bathroom into a beautiful and functional space.
Types of Bathroom Wall Panels
When it comes to choosing bathroom wall panels, there are several options available, each with its unique properties and styles to suit your preferences. Whether you’re looking for a luxurious finish, a tile effect without grout, or a custom design, there’s a panel type that will meet your requirements. Let’s explore the four main types of bathroom wall panels:
Laminate Panels
Laminate panels are an excellent choice if you’re looking for a high-end finish in your bathroom. These panels are made from an FSC certified exterior grade MDF core bonded to high-pressure laminate. They come in a variety of luxurious designs, including marble, terrazzo, and slate. Laminate panels provide a sophisticated and elegant look, transforming your bathroom into a stylish retreat.
Compact Tile Panels
If you desire the classic look of tiles without the hassle of grout, compact tile panels are the perfect solution. These panels offer a tile effect in a range of colors and patterns. With compact tile panels, you can achieve a clean and sleek appearance that is not only stylish but also easy to maintain.
PVC Panels
PVC panels are a versatile option for all walls and ceilings in your bathroom. They come in a wide range of high gloss designs, allowing you to create a sleek and modern look in your space. PVC panels are not only stylish but also durable and easy to clean, making them an ideal choice for busy bathrooms.
Acrylic Panels
For a truly bespoke look in your bathroom, consider acrylic panels. These panels are 100% waterproof and offer a polished gloss-like finish. What sets acrylic panels apart is their ability to be customized with any image or color, giving you the freedom to create a unique and personalized design.
Choosing the right type of bathroom wall panel is crucial to achieve the desired aesthetic in your space. Whether you prefer a luxurious marble finish, a tile effect without grout, a sleek high gloss design, or a customized look, there is a panel type that will meet your style preferences and functional needs.
| Panel Type | Properties | Styles |
|---|---|---|
| Laminate Panels | FSC certified exterior grade MDF core bonded to high-pressure laminate | Marble, terrazzo, slate |
| Compact Tile Panels | Tile effect without grout | Range of colors and patterns |
| PVC Panels | Suitable for all walls and ceilings | High gloss designs |
| Acrylic Panels | 100% waterproof, polished gloss-like finish | Customizable with any image or color |
Advantages of Bathroom Wall Panels
Bathroom wall panels offer several advantages for your bathroom renovation. These stylish and modern panels provide a unique look that can elevate the overall aesthetic of your space. With a wide variety of styles and colors to choose from, you can find the perfect panels to complement your personal taste and bathroom design.
One of the key benefits of bathroom wall panels is their waterproof nature. Unlike traditional tiles, these panels create a barrier against moisture, preventing the growth of mold and dampness on your walls. This ensures a hygienic and healthy environment in your bathroom.
Another advantage is the easy installation process. Bathroom wall panels are designed to be simple to install, making it a feasible DIY project for homeowners. With basic tools and a step-by-step guide, you can transform your bathroom in no time.
Once installed, bathroom wall panels require minimal maintenance. Unlike grout lines in traditional tiles that can become discolored or prone to mold, the smooth surface of wall panels is easy to clean and maintain. Simply wipe them down regularly to keep them looking fresh and spotless.
Furthermore, bathroom wall panels are cost-effective. They are often more affordable than tiles, and some manufacturers offer guarantees of up to 30 years on their products. This long lifespan and durability make them a wise investment for your bathroom.
In addition to their stylistic and practical advantages, bathroom wall panels are also sustainable. Many panels are made from responsibly sourced materials that have been manufactured with sustainable practices. By choosing these panels, you can contribute to a more environmentally friendly bathroom renovation.
Overall, the advantages of bathroom wall panels are numerous. They offer a stylish and unique look, are waterproof, easy to install, require minimal maintenance, are cost-effective, and sustainable. Consider incorporating these panels into your bathroom renovation project for a beautiful, functional, and eco-friendly space.
Fitting Bathroom Wall Panels Over Tiles
When it comes to bathroom renovations, fitting bathroom wall panels over tiles can be a convenient option. Whether you have smooth and fresh plastered walls, bare walls, or even existing tiles, bathroom wall panels can be installed as long as the tiles are clean and degreased.
Before starting the installation process, it’s essential to have a pre-installation checklist in place. Make sure that the panels are kept flat and undamaged, and check for any defects that may affect their quality. Additionally, gather all the necessary tools and materials to ensure a smooth installation process.
The installation process itself involves a few key steps. First, measuring the area accurately is crucial to ensure that you have the correct panel sizes. Depending on your needs, cutting or trimming the panels may be necessary. This can be done using tools such as a hand saw, jigsaw, or circular saw.
Next, applying adhesive to the back of the panels and fixing them to the wall is essential for a secure installation. Follow the manufacturer’s instructions for the correct adhesive and application process. Once the panels are in place, ensure that they are properly aligned and leveled.
To achieve a watertight finish and prevent any moisture penetration, sealant should be applied along the edges and seams of the panels. This will help protect against water damage and maintain the longevity of your bathroom wall panels.
Overall, fitting bathroom wall panels over tiles is a practical and aesthetically pleasing choice for bathroom renovations. It offers a cost-effective and time-saving alternative to traditional tile installations, while also providing a fresh and stylish look to your bathroom.
Key Takeaways:
- Bathroom wall panels can be fitted over tiles, smooth and fresh plastered walls, or bare walls.
- Prior to installation, ensure that panels are flat, undamaged, and check for defects.
- Measure the area accurately and cut or trim panels if necessary.
- Apply adhesive, fix the panels to the wall, and ensure proper alignment.
- Use sealant to achieve a watertight finish and protect against moisture.
How to Install Bathroom Wall Panels
Installing bathroom wall panels is a straightforward process that can be easily carried out by DIY enthusiasts like yourself. To ensure a successful installation, it is important to have the right tools and equipment on hand, as well as safety gear like gloves and goggles. Before you begin, make sure to gather the following tools:
- Measuring tape
- Marker or pencil
- Hand saw, jigsaw, or circular saw
- Sandpaper or file
- Silicone sealant and caulk gun
- Adhesive suitable for bathroom wall panels
- Spatula or trowel
- Spirit level
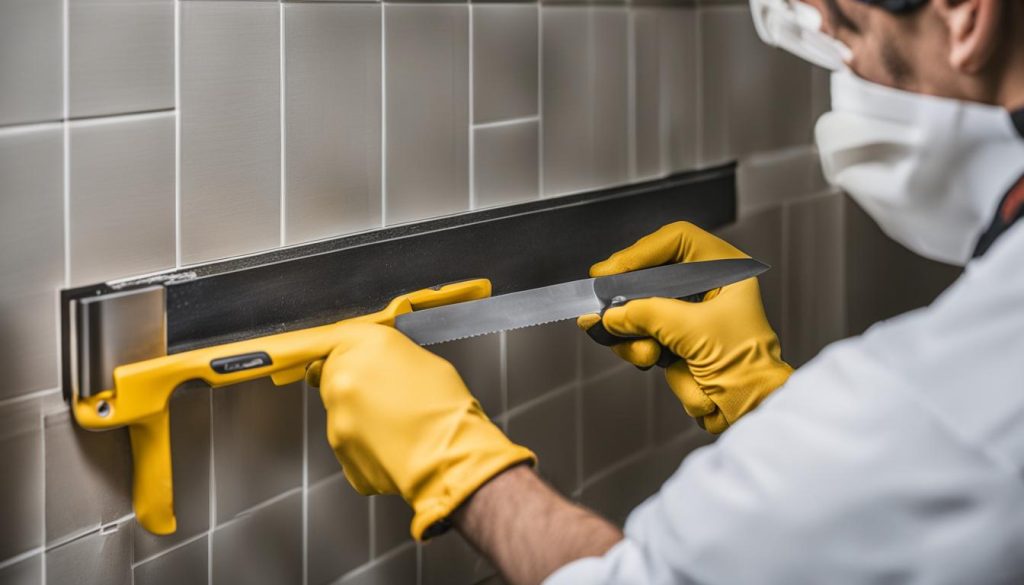
Depending on the size of your bathroom and the layout of the walls, you may need to cut and trim the panels to fit. Use a hand saw, jigsaw, or circular saw to make the necessary cuts, ensuring accurate measurements are taken beforehand. Smooth any rough edges with sandpaper or a file.
Pre-installation Checklist
Before starting the installation process, it is essential to complete a pre-installation checklist:
- Ensure your wall surfaces are clean, dry, and free from any dirt or debris.
- Inspect the panels for any defects or damage. Replace any damaged panels before proceeding.
- Keep the panels flat and undamaged during transportation and handling.
- Read the manufacturer’s instructions thoroughly to familiarize yourself with the specific installation requirements and recommendations.
Once you have completed the pre-installation checklist, you are ready to begin the installation process.
Pro Tip: It is recommended to start the installation from one corner of the wall and work your way across. This will help ensure a neat and symmetrical finish.
Applying adhesive is the first step in installing bathroom wall panels. Use a spatula or trowel to apply the adhesive to the back of each panel, making sure to spread it evenly. Fix the panels firmly to the wall, pressing them into place to ensure a secure bond.
Once all the panels are in position, use a spirit level to check for alignment and adjust if necessary. Leave the adhesive to dry according to the manufacturer’s instructions.
After the adhesive has cured, apply silicone sealant to all the joints and edges of the panels to create a watertight finish. Smooth the sealant with a caulk gun or your finger to achieve a neat and professional look.
Expert Tip: To create a seamless and aesthetically pleasing installation, choose a silicone sealant color that matches or complements your wall panels.
By following these steps, you can install bathroom wall panels with ease and achieve a stunning and waterproof finish for your bathroom. Enjoy the benefits of a stylish and low-maintenance alternative to traditional tiles.
Monica Farrelly’s Bathroom Transformation
Monica Farrelly, a DIY-savvy mum from Glasgow, achieved a stunning bathroom transformation on a budget. Instead of hiring professionals, Monica took matters into her own hands and saved thousands of pounds. With the use of budget materials such as Frenchic paint, Amazon stick-on tiles, and even a free scaffolding board for shelves, she was able to completely revamp her outdated bathroom. The entire renovation process included prepping the walls and tiles, removing old fixtures, painting, and installing new accessories. Remarkably, the total cost of Monica’s bathroom transformation was less than £500, proving that a stylish and modern space can be achieved without breaking the bank.
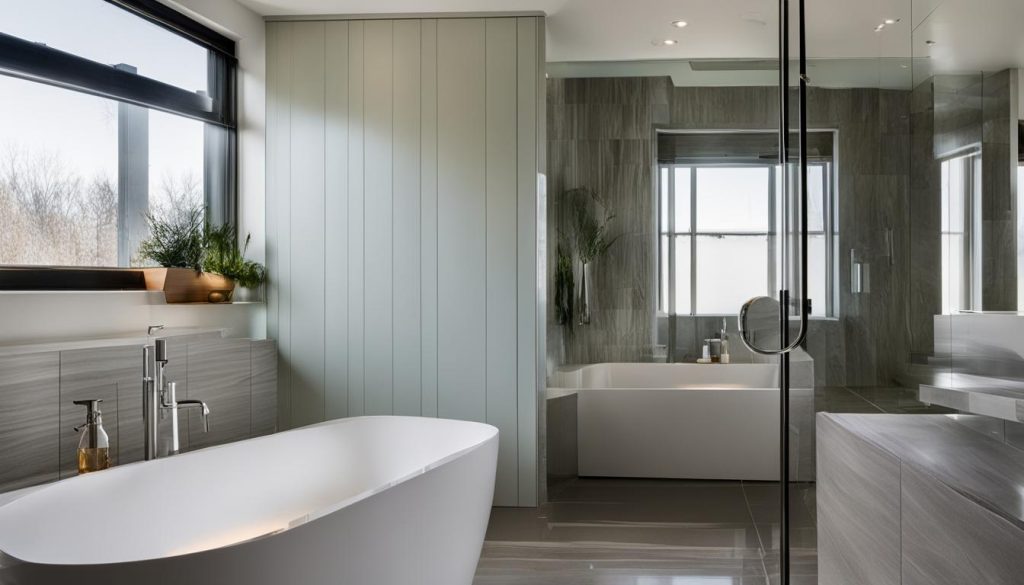
Monica’s DIY Inspiration and Satisfaction
Monica drew inspiration from various sources such as Pinterest, Facebook groups, and interior magazines. With a clear vision in mind, she followed her creative process, trying different ideas and making changes to achieve the perfect look. Monica takes great pride in the outcome of her bathroom transformation and the significant improvement it has made to her home. Additionally, the support and encouragement from her family, particularly her sons, have further fueled her passion for DIY. She finds joy in nurturing her creative side through DIY projects and considers it an ongoing learning experience.
Preparing the Walls and Tiles
To kickstart your bathroom transformation, it’s important to properly prepare the walls and tiles. This sets the foundation for a successful renovation and ensures a smooth and professional-looking finish. Monica Farrelly, the DIY-savvy mum from Glasgow, followed these essential steps to get her bathroom ready for a stunning makeover.
Step 1: Removing Fixtures and Cleaning the Walls
Before any work can begin, it’s essential to remove fixtures such as the toilet roll holder, wall cupboard, and towel rail. This provides unobstructed access to the walls and prevents accidental damage during the renovation process. Once the fixtures are safely removed, it’s time to clean the walls.
Pro tip: To remove dirt and grime, Monica used sugar soap, a powerful cleaning agent perfect for preparing surfaces before painting or tiling. It effectively removes residue and creates a clean canvas for the next steps in the renovation.
Step 2: Sanding the Tiles
While bathroom wall panels are a popular alternative to tiles, Monica opted to sand the existing tiles to create a better surface for paint adhesion. Lightly sanding the tiles helps remove any gloss or texture, allowing the paint to adhere more securely. This step is especially important if you plan to repaint the tiles instead of covering them with panels.
Step 3: Replacing Damaged Tiles
During the process of removing fixtures, Monica encountered a few unexpected challenges, with some tiles getting damaged. To ensure a seamless look, she replaced the damaged tiles with new ones. Using a jigsaw and diamond blade attachment, Monica carefully cut the tiles to size and secured them with tile adhesive and grout, ensuring a neat and professional finish.
Preparation Summary:
| Step | Action |
|---|---|
| 1 | Remove fixtures (toilet roll holder, wall cupboard, towel rail) |
| 2 | Clean walls with sugar soap |
| 3 | Lightly sand tiles for better paint adhesion |
| 4 | Replace damaged tiles using a jigsaw and diamond blade attachment |
By thoroughly preparing the walls and tiles, you’ll be one step closer to achieving a stunning bathroom transformation. With these essential steps completed, Monica was ready to move on to the exciting process of painting and adding her personal touches.
Painting and Stick-on Tiles
After prepping the walls and tiles, it’s time to give your bathroom a fresh new look. Monica opted for painting the walls and using stick-on tiles to transform her space. Here’s how she did it:
Painting the Bathroom Walls
To create a modern and stylish bathroom, Monica chose Frenchic paint in contrasting colors. She went for a bold and dramatic look by painting the walls with two coats of Frenchic Al Fresco paint in shade Blackjack. This deep black color added depth and sophistication to the space. As the old tiles were blue, Monica applied four coats of white paint to cover them completely and create a clean canvas for her new design.
DIY Tip: When selecting paint colors, consider contrasting hues that complement each other for a striking visual impact.
Frenchic paint is known for its high-quality and durability, making it perfect for a bathroom. The Al Fresco range is specifically designed for outdoor use, which means it’s resistant to moisture and easy to clean. This makes it an ideal choice to withstand the humid conditions of a bathroom.
Stick-on Tiles for a Quick and Easy Flooring Update
To update the flooring, Monica opted for stick-on tiles. She purchased self-adhesive tiles from Amazon, which offered a wide variety of styles and designs to choose from. Before laying the new tiles, Monica prepped the existing linoleum flooring by cleaning it with sugar soap to ensure a smooth surface for the tiles to adhere to.
Using measuring tape, Monica carefully measured the area and used a Stanley knife to cut the self-adhesive tiles to fit around the edges and any obstacles such as the toilet or vanity unit. The self-adhesive feature made it easy to position the tiles accurately, and Monica could simply peel and stick them in place.
Comparison of Paint and Stick-on Tiles
| Painted Walls | Stick-on Tiles | |
|---|---|---|
| Installation | Requires painting skills and time for multiple coats | Quick and easy with self-adhesive tiles |
| Durability | Durable and long-lasting when using high-quality paint | Resistant to wear and tear, can be replaced easily if damaged |
| Variety | Wide range of colors and finishes to choose from | Offers a variety of styles and designs |
| Maintenance | Easy to clean, occasional touch-ups may be required | Easy to clean and maintain |
| Cost | Cost-effective option | Affordable and budget-friendly |
In summary, painting the bathroom walls with Frenchic paint and using stick-on tiles are both effective ways to update your bathroom. While painting allows for more creative freedom and customization, stick-on tiles provide a quick and easy solution for a new flooring look. Consider your preferences, budget, and desired style when choosing between these options to create a bathroom that reflects your personal taste.
Installing New Fixtures and Accessories
To complete your bathroom transformation, it’s time to install some new fixtures and accessories. These additions will not only enhance the functionality of your bathroom but also add a touch of style and personality. Here are some key elements to consider:
New Blinds
Add privacy and control the amount of natural light in your bathroom with new blinds. Choose a style that complements your overall bathroom design and opt for materials that are resistant to moisture and humidity.
Toilet Seat
Upgrade your old toilet seat with a brand new one. There are various options available, including soft-close seats for a quiet and gentle closing mechanism, as well as seats with added features like built-in bidets or child-friendly designs.
Light Pendant
Brighten up your bathroom with a new light pendant. Consider the size and style of your bathroom when choosing a pendant light, ensuring it provides adequate lighting and complements the overall aesthetics of the space.
Storage Cabinet
Add more storage to your bathroom with a stylish storage cabinet. Look for one that offers a combination of open shelves and closed compartments to neatly organize your toiletries and keep your bathroom clutter-free.
Shelves
Create additional storage space by installing shelves in your bathroom. Whether you opt for floating shelves or sturdy brackets, they can be used to showcase decorative items or provide easy access to everyday essentials.
Mirrors
A well-placed mirror can make your bathroom appear larger and brighter. Choose a mirror that matches the style of your bathroom and consider adding an LED light strip for a modern touch.
Plants
Bring some life and freshness to your bathroom with the addition of plants. Select low-maintenance varieties that thrive in humid environments, such as spider plants, pothos, or peace lilies.
By installing these new fixtures and accessories, you’ll not only enhance the functionality of your bathroom but also create a stylish and inviting space that you’ll enjoy spending time in.
Monica’s Cost Breakdown
Monica’s bathroom transformation was a budget-friendly renovation, proving that a stunning makeover doesn’t have to break the bank. Here’s a detailed breakdown of the costs associated with her project:
| Materials | Cost (£) |
|---|---|
| Frenchic paint | £40 |
| Stick-on tiles | £60 |
| New fixtures and accessories | £250 |
| Bath screen | £80 |
| Storage cabinet | £70 |
| Blinds | £30 |
| Toilet seat | £20 |
| Light pendant | £15 |
| Shelves | £25 |
| Mirrors | £10 |
| Plants | £20 |
The total cost of Monica’s bathroom transformation was less than £500. While the bath screen and storage cabinet were the most expensive items, Monica managed to achieve a stunning result without overspending.
Monica’s resourceful approach, combined with her savvy shopping choices, demonstrates that achieving a beautiful bathroom doesn’t necessarily require a hefty budget. By utilizing cost-effective materials like Frenchic paint and stick-on tiles, as well as incorporating stylish fixtures and accessories, she was able to create a modern and inviting space without breaking the bank.
Monica’s budget-friendly renovation serves as an inspiration for those looking to transform their bathrooms on a limited budget. With a little creativity and careful planning, you too can achieve a remarkable upgrade that reflects your personal style and meets your functional needs.
Monica’s DIY Inspiration and Satisfaction
Monica found her DIY inspiration from various sources such as Pinterest, Facebook groups, and interior magazines. These platforms provided her with a wealth of ideas and inspiration to transform her bathroom into a stunning space. With a clear vision in mind, Monica embarked on her creative process, trying out different ideas and making changes along the way.
Monica’s satisfaction comes from the final outcome of her DIY project. She feels proud of the look she has created and the significant improvement it has made to her house. The positive feedback and encouragement she received from her family, especially her sons, further fuel her motivation to take on more DIY projects in the future.
For Monica, DIY is not just a hobby but a continuous learning process. She relishes in the opportunity to nurture her creative side and develop new skills. With each project, Monica gains valuable knowledge and experience that she can apply to future endeavors. The satisfaction she derives from her DIY accomplishments is a testament to her dedication and passion for continuous improvement.

